If you are new to encaustic painting, that’s great! We are sure you will love working with this versatile art medium as much as we do.
Encaustic can be frustrating and very forgiving all rolled into one. If you aren’t happy with a result you can scrape down or keep working a piece. You can come back to painting years later, fuse it and start to paint again. It is all too easy as a beginner to over fuse or scrape too hard or too soon into soft wax and ruin what you had. Practice does help an artist develop a skill with the medium and tools. Encaustic is a wonderful medium for working with photography and collage. It is an ongoing journey of discovery.
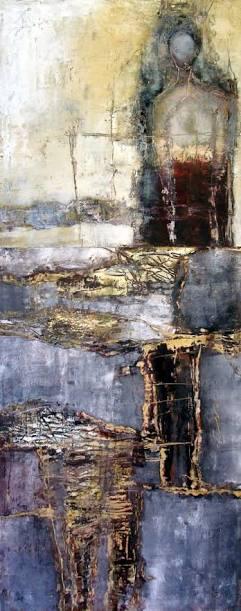
Hot wax Encaustic artwork
Encaustic is a beeswax-based paint that is kept molten on a heated palette. It is applied to a surface and reheated to fuse the paint into a uniform enamel-like finish. The word encaustic comes from Greek and means to burn in, which refers to the process of fusing the paint. Encaustic has a long history, but it is as versatile as any 20th-century medium. It can be polished to a high gloss, it can be modeled, sculpted, textured, and combined with collage materials. It cools immediately, so that there is no drying time, yet it can always be reworked. The durability of encaustic is due to the fact that beeswax is impervious to moisture. Because of this it will not deteriorate, it will not yellow, and it will not darken. Encaustic paintings do not have to be varnished or protected by glass. Encaustic paint has no toxic fumes, nor does it require the use of solvents. As a result, a number of health hazards are reduced or eliminated.

Encaustic art
For those of you not familiar with encaustic painting, in simple words you should know it’s a spontaneous medium where hot wax is applied to wood panels. It is typically layered to create more opaque, or more translucent effects, and can be combined with colored wax or collage materials.Each layer of wax can also be scraped, textured or polished for a variety of finishes.
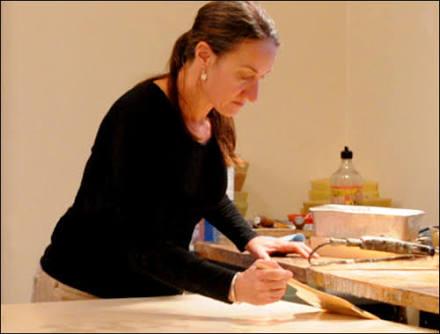
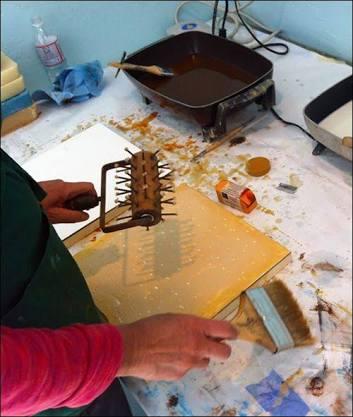
Encaustic Artist at work
The materials list are needed if you plan on making your own encaustic painting:
• Wood blocks
• Encaustic Medium-Wax
• Electric hot plate
• Collage materials
- Scratching and scraping tools
• Colored waxes if desired
• Small heat gun or propane torch
• Natural bristle brushes - Colored encaustic paint
- Melt your wax
The wax is prepared by melting “encaustic medium” into a hot plate, until it is liquid. The encaustic medium- wax and damar resin mixed together. You can use transparent or opaque wax, depending on the effect you’re going for. And, you might even want to have one hot plate of each, so you can experiment with both.
- Brush on your wax
With your wax completely melted, go ahead and brush your first layer onto your encaustic board (or plain wooden panel). At this point, just familiarize yourself with the medium, and play with the wax as you put it on the board. See how it behaves. Brushing on the warm, aromatic, buttery wax is an experience to enjoy all by itself. As you lay down your first layer of wax, Make sure that the wax and the brush remain hot, so you can brush on a thin layer at a time. Keeping each successive surface warm is also key in getting the layers to hold together.
- Start collaging in elements
Begin laying down your collage materials between layers of wax, such as a dried flower, or piece of newspaper. A sheet of music or an old family photo can also be marvelous. Remember that whatever you put down first will be more deeply buried in the wax layers, and not show up as well as the items you layer in towards the top. You can create different effects depending on where you place your papers.
- Fuse each additional layer of wax
A very important part of encaustic painting is fusing the wax layers. Each time you put a layer of wax down, you will fuse the wax, gently, with a heat gun. This creates a bond between the layers of wax, smoothing over any uneven texture. When you start out, fusing takes a lot of attention. Be sure to set a metal plate below your encaustic board when fusing, so that you won’t damage or burn the table that you’re working on. Also, have a fire extinguisher at hand and be sure that any scraps of flammable paper have been moved off the table as well.
- Scrape, scratch, and texturise
Once you get some layers down, its fun to play with creating designs or textures in the wax by scratching or scraping it with any sort of sharp objects. You can make patterns, or make abstract lines. There are many readymade tools as well. There are many more techniques to play with as you learn encaustic painting. These include using colored waxes, rubbing in small amounts of oil paint, and much more.
Once you have your first board complete, scrape the wax off the edges with a flat razor blade, and there you go – you have your first encaustic work of art. As you move forward into the world of encaustic painting, be sure to incorporate your own artistic voice into the process. The real magic of encaustics is letting your style flow through those layers of wax, floating up through the surface so all can see it.


What do you think?